
Conversations can be assigned to one agent or to a group of agents. Groups let you split the team (sales, support, developers) and decide how the chats are shared among them.
Create an agent group
Agent groups live in the workspace, not in each bot.
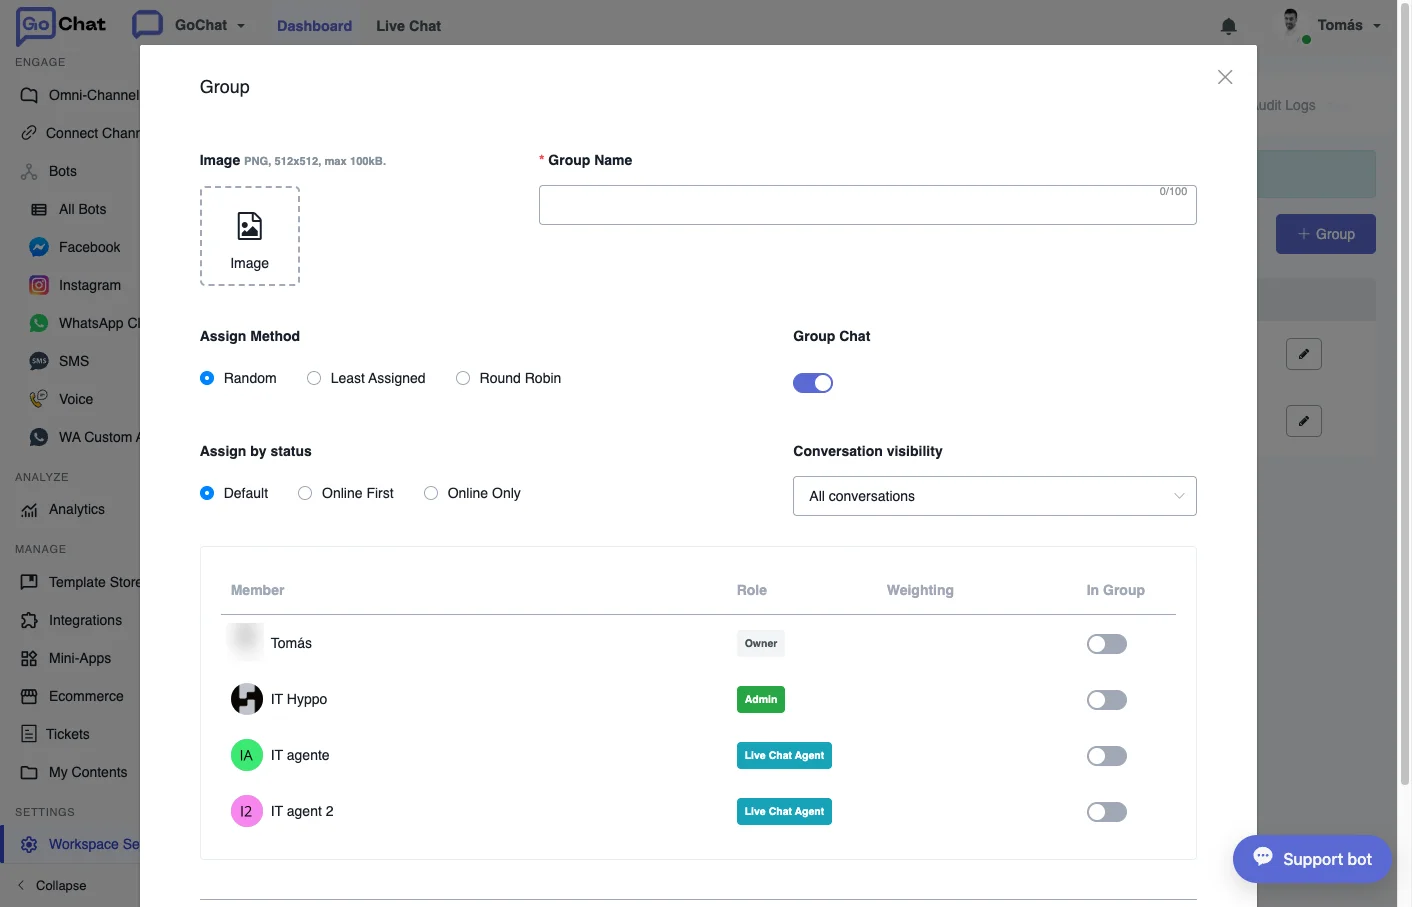
- Go to Workspace Settings → Agent Groups and click + group.
- Give the group a name, for example
Support. - Choose the Assign Method:
- Random: round robin among the members.
- Least Assigned: the chat goes to the agent with the fewest conversations assigned.
- Turn on Online First if you only want to assign chats to agents who are online.
- In In Group, pick the members of the group. With Weighting you can give some agents more chats than others: the higher the number, the more likely that agent gets the chat.
- Click Create.
To change a group later, click the pencil icon next to it.
Default groups
Every workspace also has four ready-made groups:
| Group | Who gets the chats | Method |
|---|---|---|
| Default Group 1 | All members of the workspace | Random |
| Default Group 2 | All members of the workspace | Least Assigned |
| Default Group 3 | Only members with the Agent role | Random |
| Default Group 4 | Only members with the Agent role | Least Assigned |
When an agent counts as online
An agent is online while they have Live Chat open in a browser tab, either from the main dashboard or from inside a bot. If they close that tab or move away from it, GoChat can no longer tell that they are online.
Assign from a flow
Use an action step in a flow or sub-flow: Action → Basic Actions → Assign to Agent or Assign to Agent Group, and choose the agent or the group.
The condition step has checks about agents, so you can decide what to do when nobody is available:
- Is assigned to agent
- Is assigned agent Online
- Has agents Online
- Last agent interaction (minutes ago)
For example: if the assigned agent is not online, assign another one. If there are no agents online, tell the user that the team will answer during business hours.
The system field Last Agent Interaction also works in conditions with date and time checks (after, before, between).
Collaborators
Up to 5 agents can work on the same conversation at once. This helps when a case needs input from more than one person.
- Turn it on in Workspace Settings, in Collaborator Settings.
- Open a conversation and click Add Collaborators on the right sidebar, above the user profile.
- Pick the agents who will help.
The Collaborating filter in the conversation list shows the chats where you are a collaborator, even if you are not the owner. In flows, Basic Actions has Add a Collaborator, Remove a Collaborator and Remove All Collaborators.