
Agent groups organize your Live Chat agents so conversations reach the right people. For example, one group can handle customer questions while another one takes care of outreach.
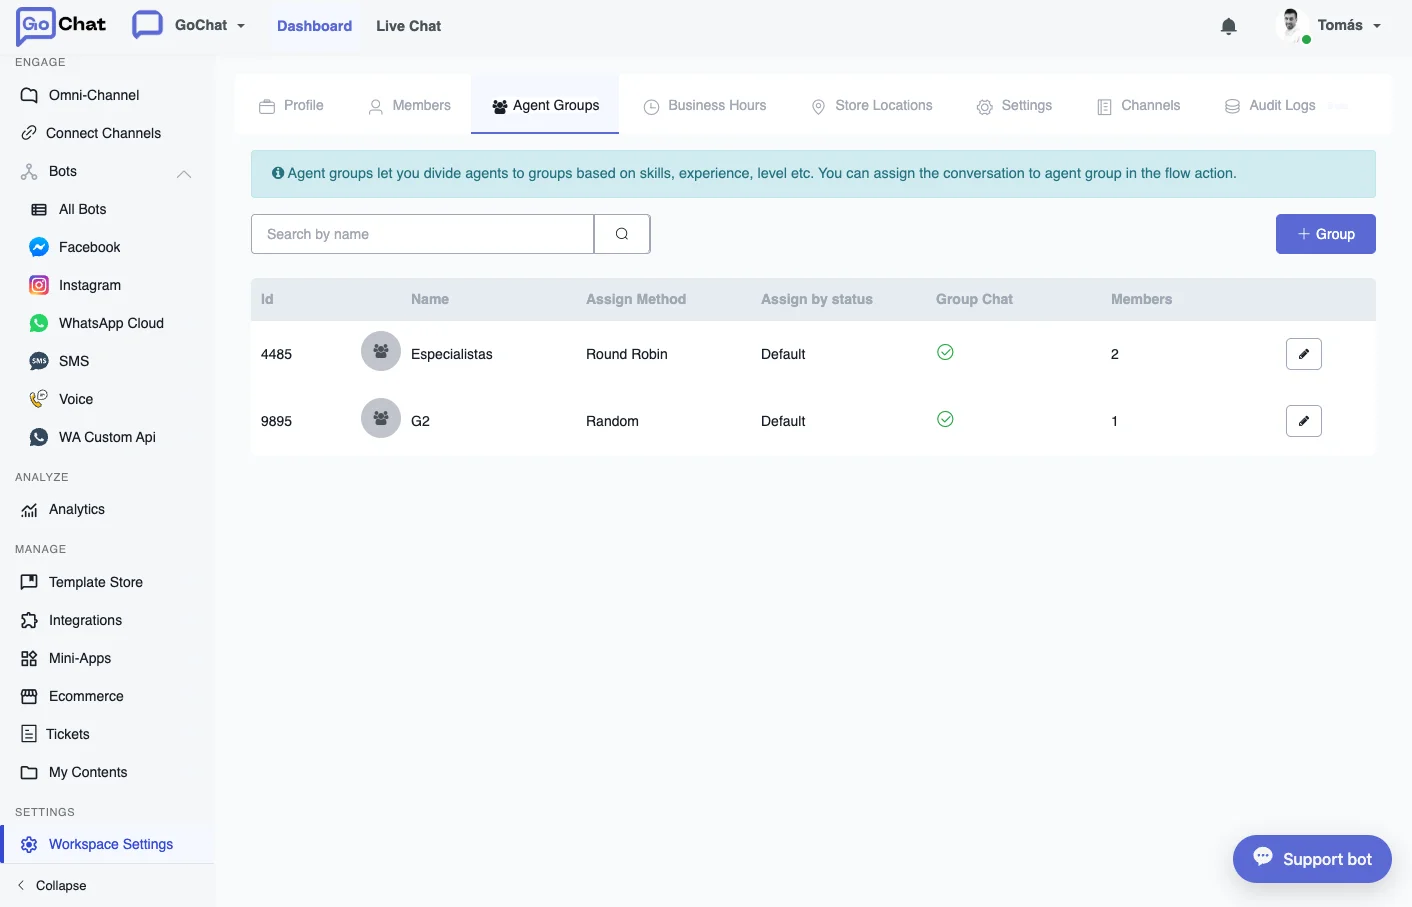
Create an agent group
- Go to Workspace Settings → Agent Groups and click +Group.
- Enter a name for the group.
- Choose the assignment by status. It decides whether conversations go first to the agents who are online or to the ones who aren’t.
- Choose the assignment method, which sets the order in which conversations are handed out. For example, Round robin gives each agent the same number of conversations.
- Turn on the toggle next to each person you want in the group. Only members with the toggle on are included.
- Turn on Group Chat if you want the agents of the group to be able to talk to each other.
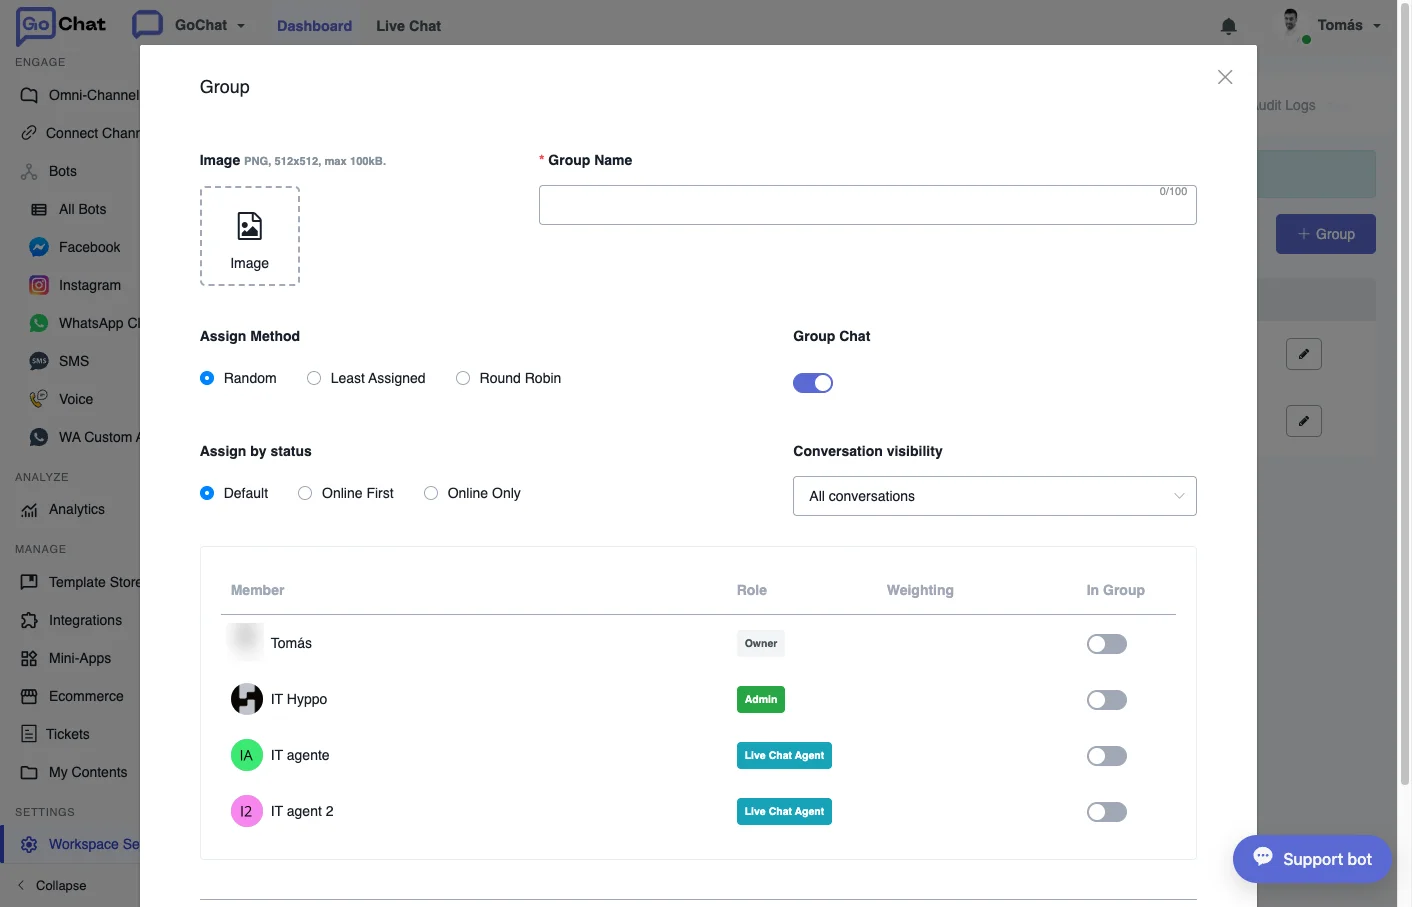
The weighting of each member sets whether some people get priority over others when conversations are assigned.
Assign conversations to a group
Agent groups are used from the Flow Builder. Add an action step at the point of the flow where the conversation should go to a person, and choose the agent group there. You can use a different group at each stage of the flow.